
By: Jaz McKibben
What Is a Descending Device and Why It Matters
Responsible anglers know that using best release practices can be the difference between a fish surviving release or floating off. Fish reeled up from depth can experience barotrauma, a pressure-related injury, making it difficult for them to return on their own. Fortunately, this doesn’t have to be a death sentence for fish, and can be mitigated by using a descending device – a tool for anglers to return fish suffering from barotrauma back to depth, increasing their survival odds. Although there are many styles of descending device available for purchase, sometimes gear gets lost or broken, so it’s handy to know how to make your own. Whether it’s an inverted hook, a modified lip-grip or a weighted crate, DIY descending devices are simple, effective tools to help fish survive, and they don’t have to break the bank.
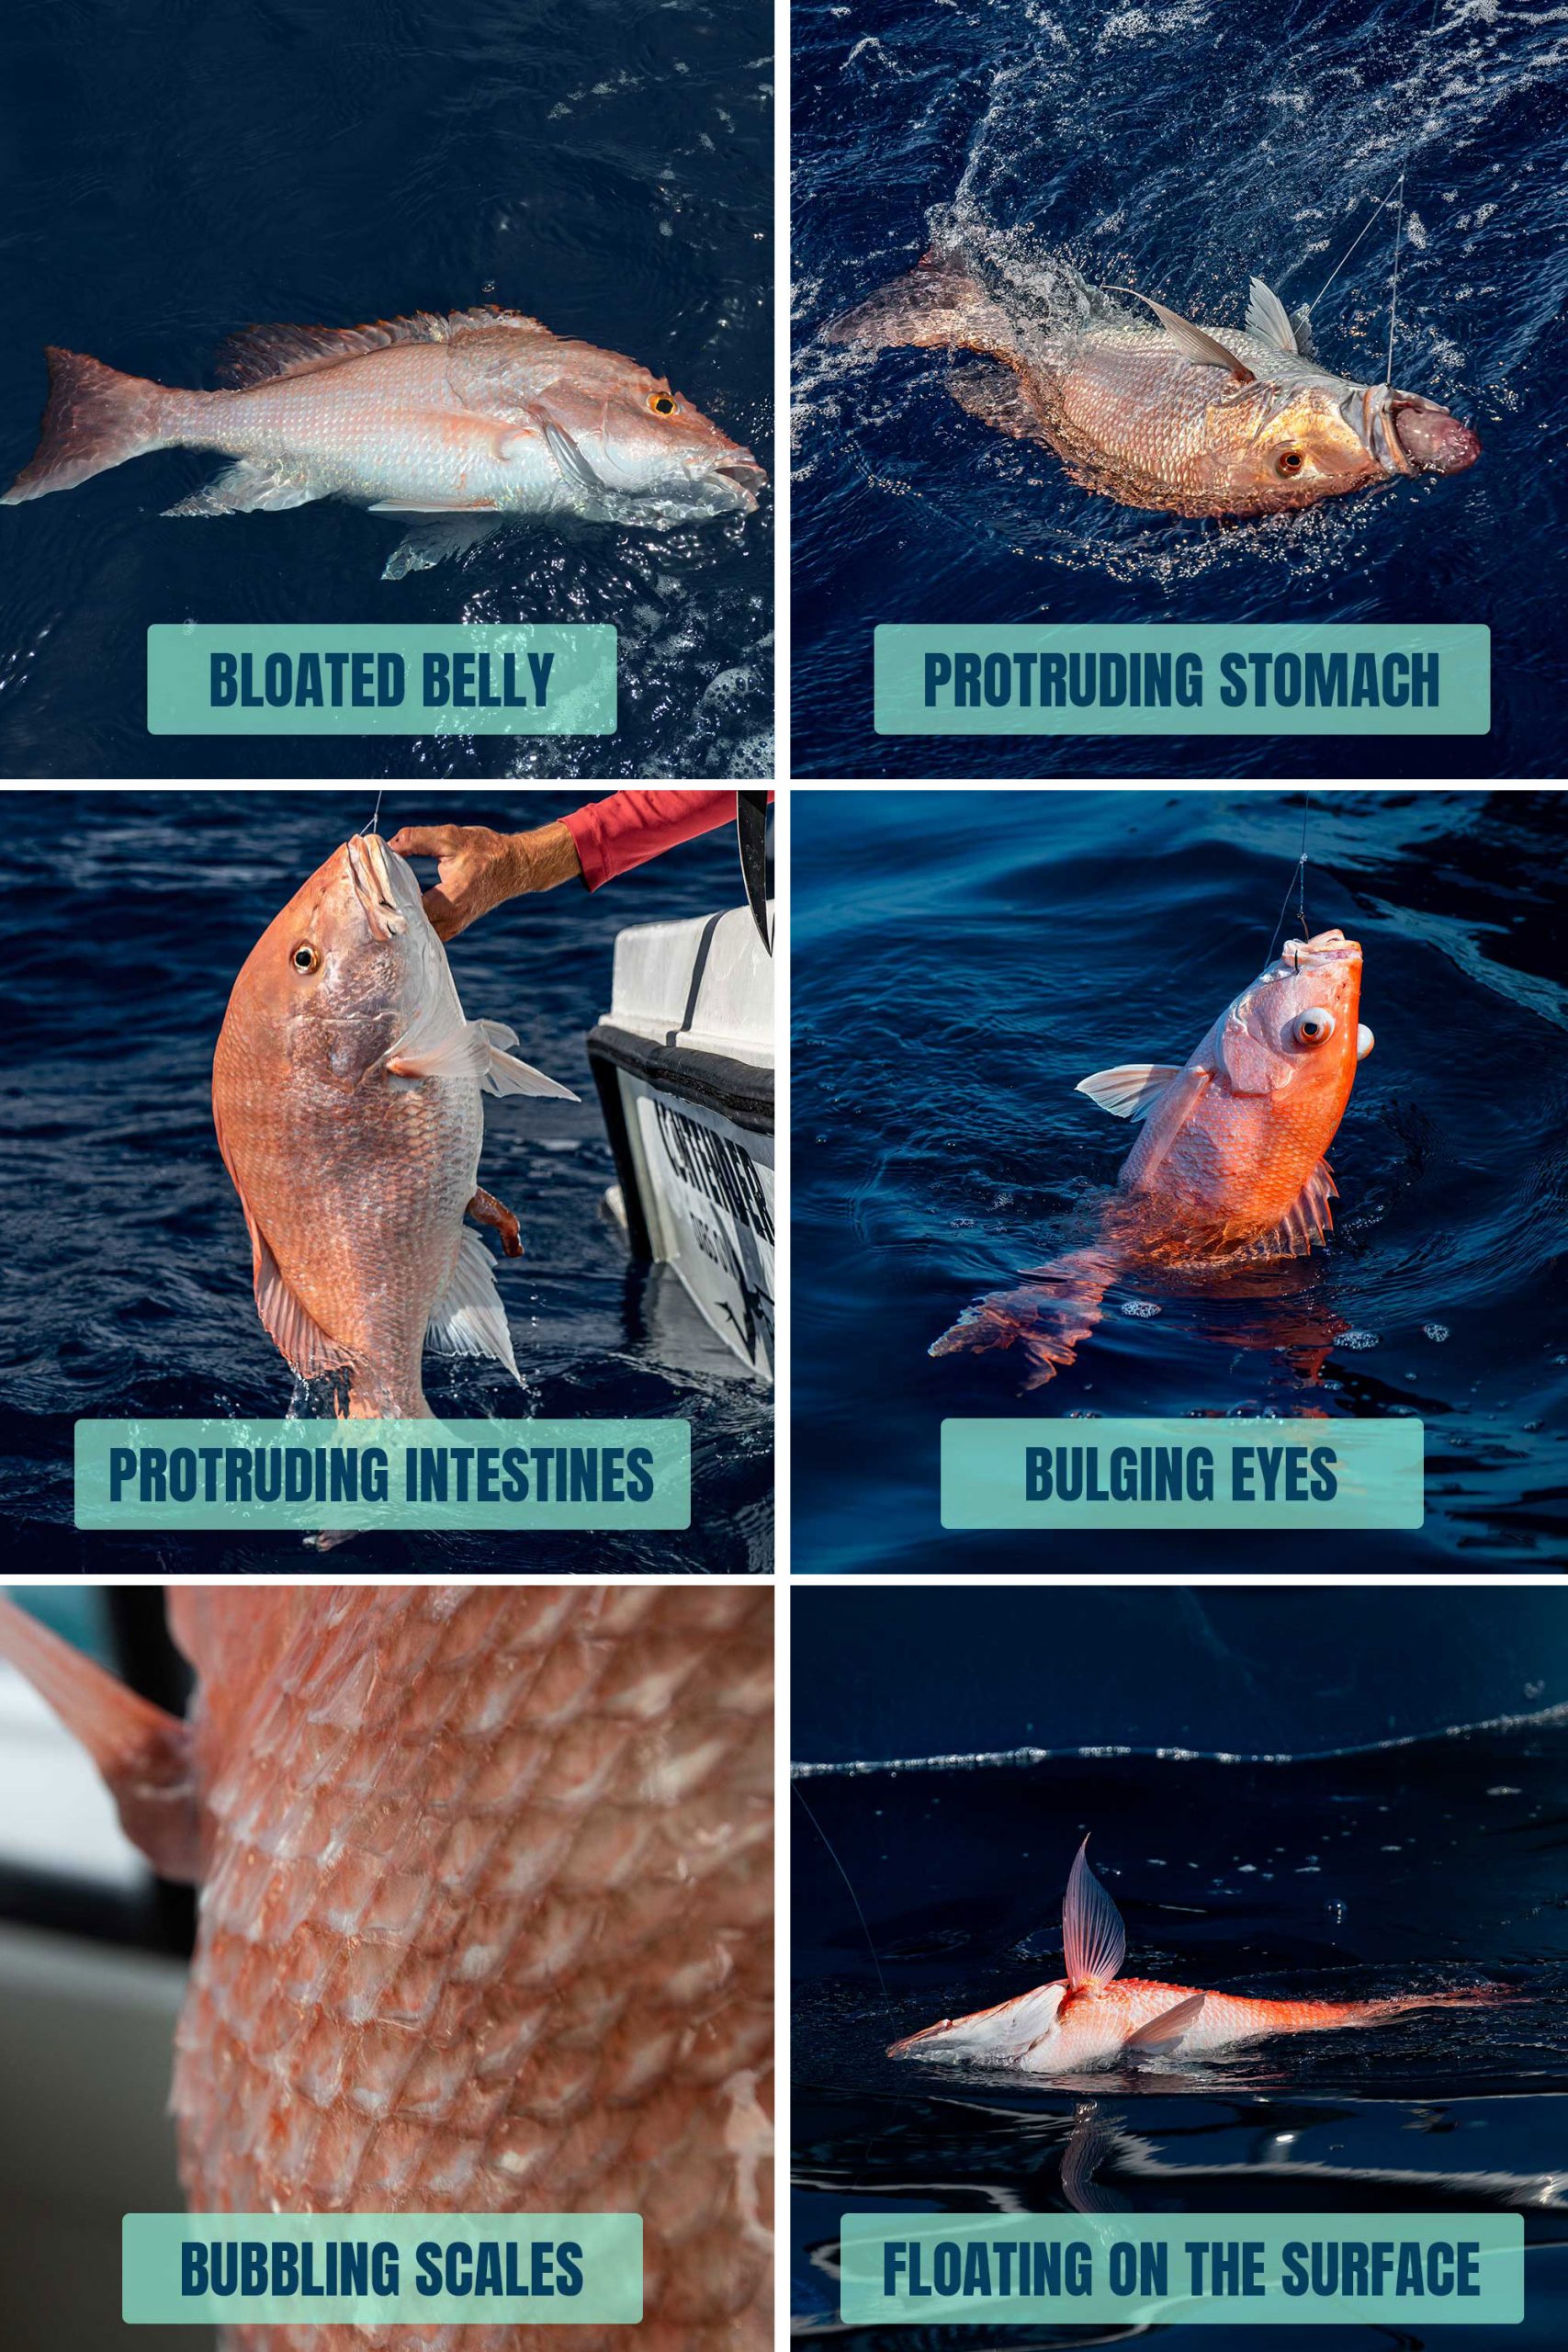
Fish cannot release this gas or swim back down on their own, making descending devices a key tool for responsible anglers. Using one is easy and quickly returns fish to depth – past predators like sharks and dolphins – increasing survival rates.
Types of Devices and How to Make Them
Three options for DIY descending devices include an inverted hook, a modified lip-grip device and a weighted crate. These styles require minimal materials and can be made in ten minutes or less.
Inverted Hook
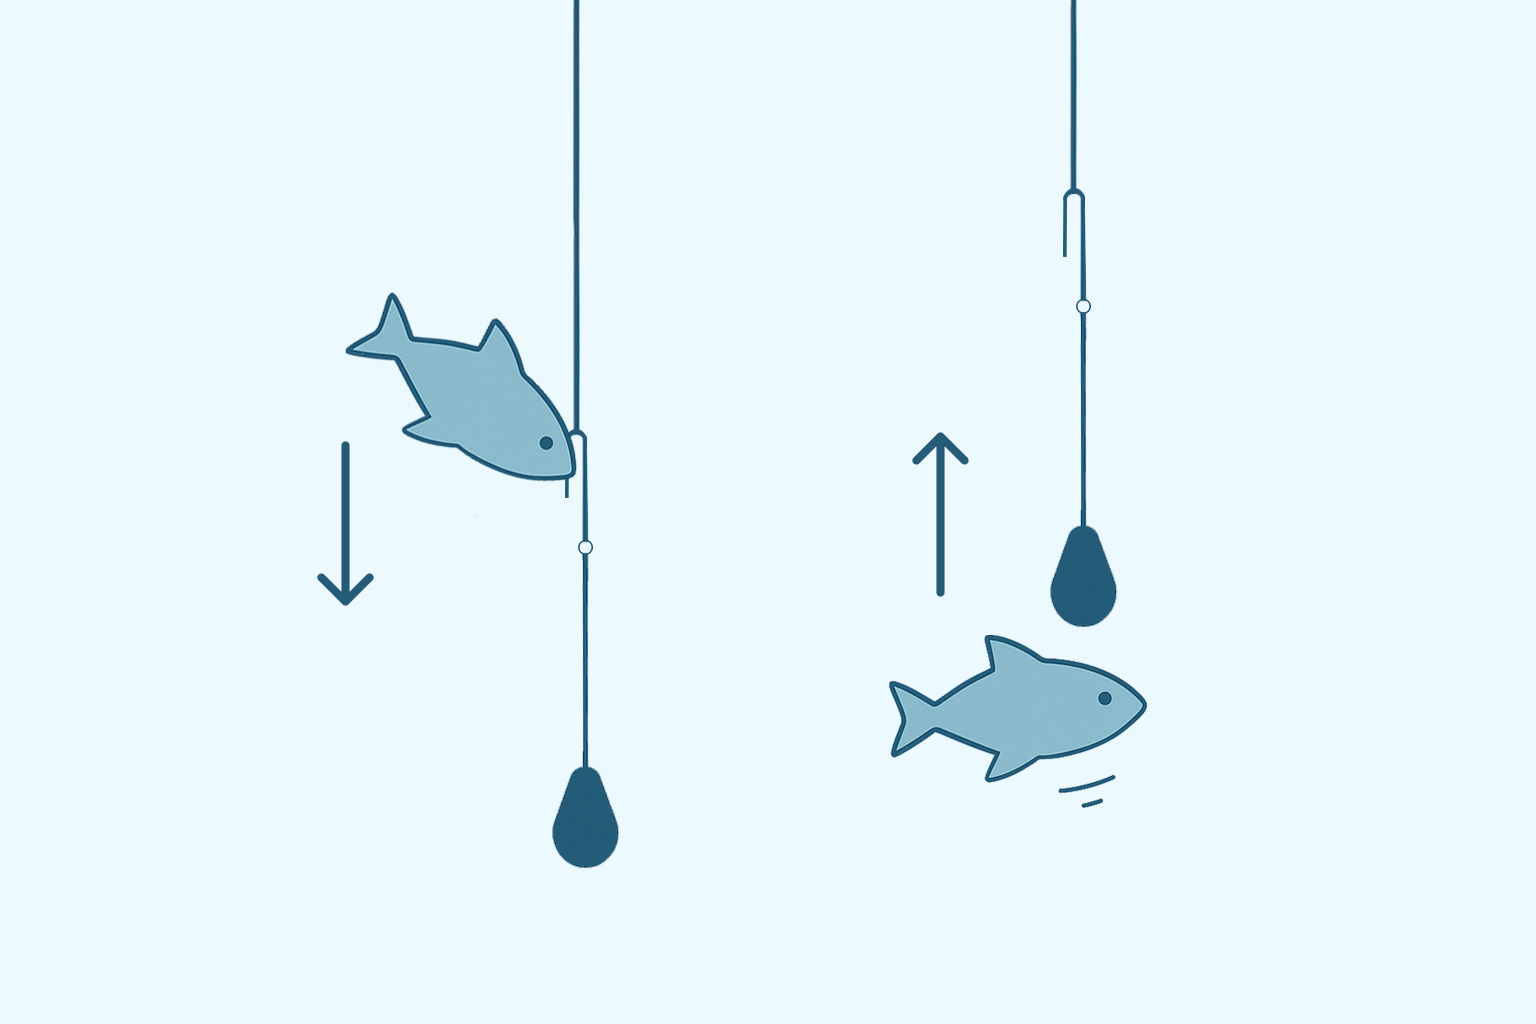
For a DIY inverted hook, you’ll need cutting pliers, needle-nose pliers, a twelve-inch piece of wire, a zip tie (monofilament works too) and a weight. The DIY inverted hook is extremely simple – you can make it in minutes and it works at any depth. This mimics commercially available inverted hooks such as the SeaYaLater, the Shelton Fish Descender, and Roy’s Fish Saver.
How to Make It:
-
-
-
- Form a complete loop at the top for attaching your weight.
- Bend the wire into a narrow u-shape, twisting until you create a second loop in the middle of the wire. Your u-shaped hook should now have one loop on the end and another in the middle.
- Cut the tip with no loop at an angle for a sharp point to pierce the fish’s jaw.
- Attach the lead weight using monofilament or zip tie.
- Pierce the thin part of the fish’s skin behind its lower jawbone.
- Return the fish to the water, allow it to reach the desired depth, and slide the hook out of the fish’s jaw by reeling the hook back up.
-
-
For a demonstration on how to make your own inverted hook, follow along with this FWC Saltwater Fishing video.
Modified Lip-Grip
For a modified lip-grip device, you’ll need a fish landing device like The Fish Grip™, monofilament, a rubber band, a drill and a cutting device. The device functions similarly to other lip-clamp style devices such as the SeaQualizer, but is operated manually when the angler pulls on the line to open the jaws of the device.

How to Make It:
-
-
-
-
- Cut off any bungees or attachments.
- Drill a second hole into the other handle.
- Wrap a rubber band around the handles to keep enough pressure on them to clamp a fish but allow for some give when releasing a fish.
- Using the line, tie a loop through each hole – one to attach your weight, and the other to attach to your rod.
- Pull up on the line once the fish has reached the desired depth, which should open the clamp, allowing the fish to swim off.
-
-
-
For a demonstration on how to make your own modified fish-grip device, follow along with this Oregon Department of Fish and Wildlife how-to video.
Weighted Crate
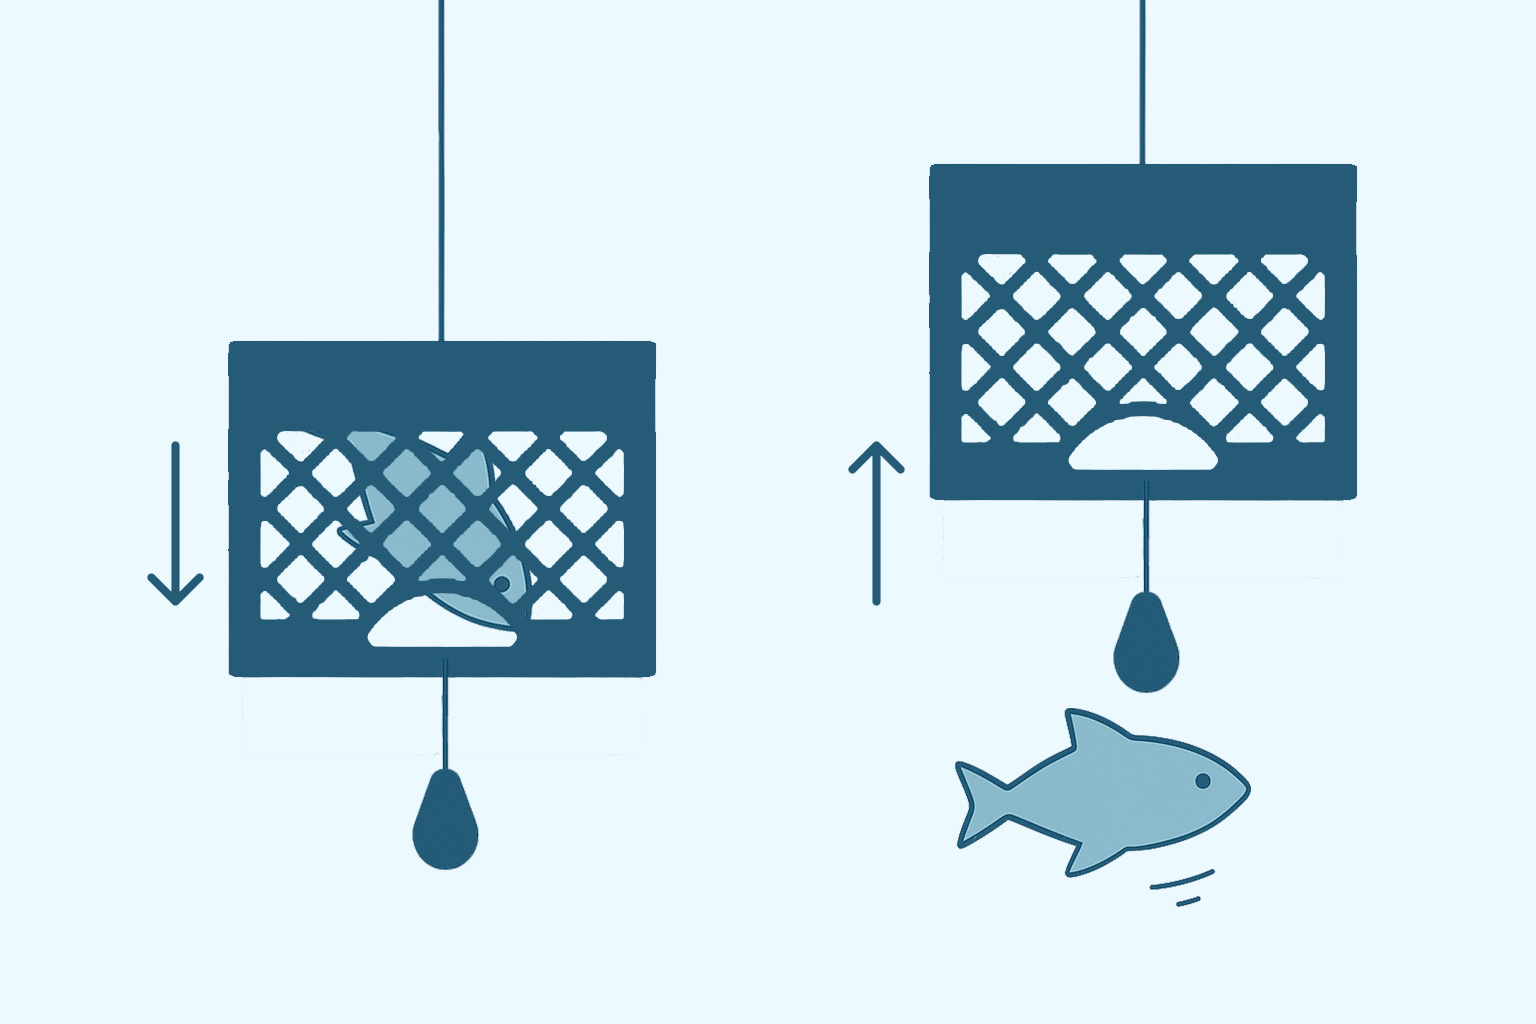
Another style of device is a weighted crate, which is a good option when you have multiple fish. All you’ll need for this device is a milk crate, weights, zip ties, 80 feet of rope and a clip.
How to Make It:
-
-
-
-
-
- Attach weights to the milk crate using zip ties.
- Attach a clip to the end of your rope and clip it to the top of the milk crate.
- Place fish gently inside, making sure they fit comfortably.
- Lower the crate with the fish inside and pull it back once you reach the desired depth, allowing fish to swim away.
-
-
-
-
For a demonstration on how to make your own weighted crate, follow along with this FWC Saltwater Fishing video.
Best Practices for Using DIY Descending Devices
DIY descending devices like inverted hooks, modified lip-grips and weighted crates are simple, affordable tools to descend fish suffering from barotrauma. Even without a commercial device, anglers can make a meaningful contribution to reef fish survival by making their own. Whether you’re using a commercially available device or one you made at home, Return ‘Em Right’s free training and best release practices are available to help you sharpen your release skills and give each fish its best chance at survival.